Friday, May 28, 2010
Thursday, May 27, 2010
Tuesday, May 25, 2010
My First Cake Order
After getting a better idea for what she wanted and determining that it was something I could do with my current skill set, I happily agreed. It was such a great opportunity for me to get some more practice in and as you all know I do love baking so any excuse is the perfect excuse!
I used the baptism invitation as my inspiration.
First, before we get to the final outcome, I have to show you the smoothest icing job I think I’ve ever done.
I was proud of myself.
After I stopped patting myself on the back for the smooth icing, I made the cake to match the invitation.
When I was all done, I boxed them up.
Then I delivered them to the party location and set them up.
Monday, May 24, 2010
Happy Days
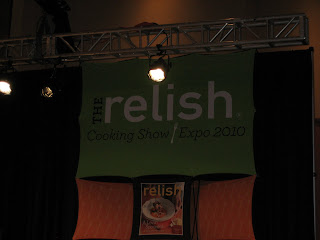
We got there early so we could reserve our seats and check out all the booths. One of the booths was giving free five minute sample massages…heavenly!
I was not all that familiar with Jon Ashton before the show, but I am now a huge fan. He was so hilarious and entertaining, we laughed all night long. It really should have been advertised as a comedy show that incorporates cooking.
Jon has an accent from the other side of the pond and he has some sayings that are a bit different, but two of them really stuck on me: “Happy Days” and “Smashing”. I can’t do a British accent very well, but it hasn’t stopped me from using these phrases whenever I can.
My friend’s brother help set-up the kitchen for the event and during the intermission we got to meet him…yay!
And because it was a cooking show and I do love food, here are the dishes Jon taught us how to make in the midst of his wonderfully funny stories:
(Jon telling one of his funny stories.)
Crispy Herbed Chicken with Proscuitto
Fresh Tomato Salad (It looks like the title on the web page is wrong, but the recipe is correct)
Linguine with Garlic, Shallots and Parmigiano Reggiano
Granny Ashton’s Scones with Macerated Berries
Monday, May 17, 2010
Party Post: Adorable Ladybugs
Saturday was my friend Tiffany’s little girl’s 1st birthday party. She went all out; it was amazing how much time and love she put into every single detail to make this party perfect and special for her daughter.
Take a look, she did a wonderful job!
Invitations
As you can see, she even made return address labels on the envelope to match the invitation.
SilverwareEveryone could take home a little ladybug.
BalloonsBalloons always make a party more festive.
BannerSo fun!
I didn’t get a picture of the food table, but she made everything herself, including Pioneer Woman’s Jalapeño Poppers (they were gone in a flash)! Tiffany also loves Pioneer Woman…it’s why we’re friends…not really, but it helps :)Remember my grass cupcakes? Well, my talented friend made ladybug tags to match the rest of the party décor.
Right before the party started I added in the ladybug picks and stuck on some of my pink royal icing flowers. Aren’t they cute?
If you thought the cupcake was cute, wait until you see the cakes Tiffany made. Adorable!
Sunday, May 16, 2010
Grass Cupcakes
Back to the cupcakes…I made a batch of confetti cupcakes in green liners. We were having trouble finding green liners until just a few days before when I came across these at King Soopers:
However, the store only had one package (which does not have enough of one color for a full batch of cupcakes) and I didn't have time that day to check the other stores. But thanks to my wonderful Mom, who picked up some other packages at a different store, we were able to get enough green liners.
Then I tried out a new butter cream recipe; Extra Special Butter Cream. I tweaked it just a tad (details below). Then I dyed it green using a combination of Wilton Kelly Green and Lemon Yellow. As a reminder, butter cream colors always get a couple of shades darker as they set.
I filled a bag with Tip #233 and got to work.
These are preliminary pictures of some of the cupcakes (not the full batch), just wait until you see the final product!
Saturday, May 15, 2010
Pioneer Woman’s Strawberry Shortcake Cake
She posted a recipe almost exactly one year ago that I’ve been waiting to try. You're probably thinking, "a year? seriously? why the delay?". Well, it is because it probably wouldn’t be too smart if I try out a cake recipe for just the fiancé and me...the leftovers would end up with one of us and we’d probably eat the whole thing. So I wait until an opportunity arrives that allows me to share.
This past Monday was our last session of pre-marriage class and we were having a little potluck to celebrate. What better way to celebrate than cake? Plus the strawberries have been so good lately. So I pulled out the Strawberry Shortcake Cake recipe from my growing list of awaiting recipes.
The cake is a pretty dense cake, which is good since it’s covered in strawberries and strawberry juices. Yep, each layer is covered in fresh strawberries, but it doesn’t end there.
(The cake and strawberries go into the freezer for a short amount of time before icing.)
Enjoy!
Wednesday, May 12, 2010
Amazing!
The only problem was it wasn’t so good to my cookie sheets. I sprayed the cookie sheets (my old ones that I don’t really use for baking anymore) with cooking spray but I may have had the potatoes in the oven a tad too long and I ended up with burn spots all over the pans.
I scraped, I soaked, I washed and I scrubbed…nothing was working. I had come to terms with my cookie sheets being ‘worn and seasoned’ – mostly because I have newer nicer cookie sheets in the cabinets I can use for cookies. But being my typical Type A 'Monica' self, it still bothered me a bit.
Then I made my discovery!
(Picture from http://www.armhammer.com/)
I had baking soda out on the counter from a baking project (I’ll post more on that later this week); as I was getting ready to put it away I saw a statement on the box, “cleans all surfaces and items” and then it listed a variety of things, one was pots. Why not cookie sheets? I’ve already tried everything else it’s not like it could make the cookie sheets worse, right?
So I sprinkled baking soda all over the cookie sheets. I let them sit for a bit (there was a tad bit of water on the cookie sheets from another failed try at scrubbing but not enough to fully dissolve all the baking soda). I used the scraper side of my dishwashing brush and sure enough all the burn marks were coming off!
I was so happy…I know that’s a little sad, but really it was a highlight of my day. And now, I’m pretty convinced baking soda can solve just about any dilemma. At least it will be one of the first things I try from now on.
Maybe some of you already knew this wonderful baking soda secret, but just in case there is anyone else out there like me that had only used baking soda for, well, baking; I wanted to share the news.
Friday, May 7, 2010
KIND
(Picture from www.kindsnacks.com)
I’ve tried some of the other KIND bar varieties, but so far this one is my favorite.The Kind Almond & Coconut bar is:
All Natural
Gluten & Wheat Free
Low Glycemic Index (46)
4g Fiber
Non GMO & No Trans Fats
Dairy Free
Very Low Sodium
No Sulphur Dioxide
There are only seven ingredients. The fat content is kind of high, but it’s not trans fat and it’s pretty natural sources – the majority of the bar is almonds and coconut so obviously the fat is a bit higher than some of the other varieties.
You can check out the other snack bar varieties at: http://www.kindsnacks.com/
I have no connection to Kind; I just love the Coconut & Almond bar and wanted to share!
Saturday, May 1, 2010
Perfect Match
I used my new Wilton 8-inch round, 3-inch deep cake pan; it holds an entire box of cake mix. It was highly recommended by my Wilton instructor but I didn’t get it until Christmas. I like it because it’s only one pan to clean instead of two and all you have to do is level the top and then cut the rest in half. But, it also gave me the BEST cake I’ve ever had. It came out of the pan so easy and so perfect.
Look, no missing pieces that stuck to the pan.
Isn’t it a beauty. I probably stared at the cake for 3 minutes I was so impressed. (I know you must be thinking I’m crazy, but the small things in life excite me.)It was a vanilla cake, but I colored it pink since they had a baby girl. (I know, shocking, since those that know me know that I despise the color pink…it goes back to me not being much of a girly girl. But I figured not everyone is as pink averse as myself and it would be kind of cute, and it would kind of match the decorations.
Note how perfectly flat the cake is…
I finally got to use the cake cutter I got for Christmas and it worked great! It was so easy and so level.As it turns out I get carried away in the baby clothes section of the store. Those mini outfits just sucker you in.
Here’s the gift bag we got them.
What does this have to do with the cake?
Here’s the cake.
I used the gift bag for inspiration.
They match!
In order to match the glitter dots on the bag on the cake I went off to Hobby Lobby to find something that might work. I found pearl dust and I have to say I was very pleased (I used white); it was so easy to use and added just the right amount of shimmer. I can’t wait to use it more in the future.
Sparkle Circles on Gift Bag
Light Pink Sparkle Circle on Cake
Sorry the sparkly shimmer doesn’t really show up that well in the picture.
I needed more than just dots for the top of the cake, so I tried an experiment with the name. It was the first time I had tried something like this that wasn't made out of royal icing.
The name is made out of chocolate!
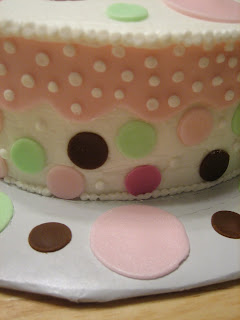
The cake is frosted in normal frosting. I made the dots (on the cake and on the cake board) and the pink scallop border out of fondant.
Look what else I found at Hobby Lobby….
A fun window cake box!
I have to say that the cake box made it SO much easy to transport and was much more convenient for a ‘drop off’ cake than my cake carrier.
Overall, I'm very happy with how it all turned out!


