Showing posts with label Daring Bakers. Show all posts

Wednesday, October 27, 2010

Daring Bakers: Doughnuts

The October 2010 Daring Bakers challenge was hosted by Lori of Butter Me Up. Lori chose to challenge DBers to make doughnuts. She used several sources for her recipes including Alton Brown, Nancy Silverton, Kate Neumann and Epicurious.

I had never made doughnuts before, heck; I had never fried anything before. I was a bit nervous for this challenge, but I picked up a cheap candy thermometer (for the oil) at the grocery store and decided to give it a shot. Especially since the whole point of Daring Bakers is to try things a bit beyond my comfort zone that I normally wouldn’t choose to try on my own, doughnuts definitely fit that category.

We had a choice of doughnut recipes to use for this challenge and I selected the pumpkin cake doughnut recipe, it seemed very appropriate for fall. Plus, I think I’m the only food blogger that hasn’t posted a pumpkin recipe yet, so I had to catch up. (The other two options were yeast doughnuts or old-fashioned buttermilk cake doughnuts.)

Overall, the doughnut experience was okay, but not great.

I substituted half of the flour with whole wheat flour and it seemed to be fine. The dough was very easy to work with.

But I’ll be honest, all that oil and the frying process was kind of gross, I’m not really a fan. I also think the oil may not have been quite right, even though the thermometer said it was at the right temperature, the donuts came out very dark colored, too dark for donuts if you ask me…perhaps I shouldn’t have used the cheap candy thermometer from the grocery store. Some of the doughnut holes also didn’t cook all the way, but the doughnuts did.

Since I was thrilled with the process or the results of frying, I only did half of the batch. The other half I baked in the oven! I read about some other Daring Bakers giving it a try and found some information online for oven temp and time. It was much easier and probably healthier. They looked like donuts, but they had more of a muffin texture than a traditional doughnut texture. I thought the baked doughnuts were much prettier than the fried versions (but again, the fried doughnuts were SO dark).

As far as taste goes…the doughnuts were probably about average, they were okay, but nothing spectacular and not as good as a doughnut you could buy at the grocery store for a lot less time and money. They definitely weren’t as good as the best doughnut I’ve ever had, which was actually a pumpkin spice doughnut I had in college. It was shortly after Krispy Kreme came to Colorado and some friends and I were on our way back from Denver and it was super late, but Krispy Kreme was still open so we stopped for a quick snack and it was SO good. So maybe, I shouldn’t have tried making pumpkin doughnuts since the bar was set so high, oh well.

Most Thursdays, my fiancé and I have dinner at my house. Since I had to make the doughnuts for Daring Bakers this month, I decided to use them for a breakfast theme dinner. However, since doughnuts aren’t really that great for you (even if you do use half whole wheat flour), I tried to find some healthy and light options to go with it. We made Florentine Scramble from Sandra Lee’s Semi-Homemade Cooking Made Light cookbook and it was DELICISIOUS! The fresh basil in the eggs was so good. I bought some Jimmy Dean turkey sausage; which was also very good and went over MUCH better with the fiancé than the time I bought turkey bacon. And I rounded it out with an apple and grape fruit salad.

If you want to try the pumpkin doughnuts, here’s the recipe:

~~~~~~~~~~~~~~~~~~~~~~~~~~~
Pumpkin Doughnuts:

Preparation time:
Hands on prep time - 15 minutesChilling time - 3 hoursCooking time - 10 minutes
Yield: About 24 doughnuts & 24 doughnut holes

Ingredients
All Purpose Flour 3.5 cup / 840 ml / 490 gm / 17 ¼ oz
Baking Powder 4 teaspoon / 20 ml / 24 gm / .85 oz
Table Salt 1 teaspoon / 5 ml / 6 gm / .2 oz
Cinnamon, ground 1 teaspoon / 5 ml / 6 gm / .2 oz
Ginger, ground ½ teaspoon / 2.5 ml / 3 gm / .1 oz
Baking Soda ½ teaspoon / 2.5 ml / 3 gm / .1 oz
Nutmeg, ground ¼ teaspoon / 1.25 ml / 1.5 gm / .05 oz
Cloves, ground 1/8 teaspoon / .6 ml / ¾ gm / .025 oz
White Granulated Sugar 1 cup / 240 ml / 225 gm / 8 oz
Butter, Unsalted 3 Tablespoon / 45 ml / 42 gm / 1.5 oz
Egg, Large 1Egg Yolk, Large 2
Pure Vanilla Extract 1 teaspoon / 5 ml
Buttermilk ½ cup + 1 Tablespoon / 135 ml
Pumpkin 1 cup / 240 ml / 285 gm / 10 oz (Canned pure pumpkin or fresh cooked and pureed pumpkin – DON’T use pumpkin pie mix!)
Canola Oil DEPENDS on size of vessel you are frying in – you want THREE (3) inches of oil (can substitute any flavorless oil used for frying)

Powdered Sugar Glaze:
Powdered (Icing) Sugar 2 cup / 480 ml / 250 gm / 9 oz
Whipping Cream (About 32% butter fat) 4 Tablespoon + more if needed / 60 ml

Directions:
Whisk together the first 8 ingredients in medium bowl to blend. Using electric mixer, beat sugar and butter in large bowl until blended (the mixture will be grainy and not smooth). Beat in egg, then yolks and vanilla. Gradually beat in buttermilk; beat in pumpkin. Using rubber spatula, fold in dry ingredients in 4 additions, blending gently after each addition. Cover with plastic; chill 3 hours.
Sprinkle 2 rimmed baking sheets lightly with flour. Press out 1/3 of dough on floured surface to 1/2- to 2/3-inch (12 mm to 15 mm) thickness. Using 2 1/2-inch (65 mm) -diameter round cutter, cut out dough rounds. Arrange on sheets. Repeat with remaining dough in 2 more batches. Gather dough scraps. Press out dough and cut out more dough rounds until all dough is used.
Using 1-inch (25 mm) diameter round cutter, cut out center of each dough round to make doughnuts and doughnut holes.
Line 2 baking sheets with several layers of paper towels. Pour oil into large deep skillet to depth of 1 1/2 inches (40 mm). Attach deep-fry thermometer and heat oil to 365°F to 370°F (185°C to 188°C). Fry doughnut holes in 2 batches until golden brown, turning occasionally, about 2 minutes. Using slotted spoon, transfer to paper towels to drain. Fry doughnuts, 3 or 4 at a time, until golden brown, adjusting heat to maintain temperature, about 1 minute per side. Using slotted spoon, transfer doughnuts to paper towels to drain. Cool completely.

Glaze Directions:
Whisk powdered sugar and 4 tablespoons whipping cream to blend. Whisk in additional cream, 1 teaspoon at a time, to form medium thick glaze.
Can be made up to 3 hours ahead.
Add doughnut holes to bowl of cinnamon sugar and toss to coat.
Spread doughnuts on 1 side with powdered sugar glaze.
Arrange doughnuts, glazed side up, on racks. Let stand until glaze sets, at least 30 minutes.

~~~~~~~~~~~~~~~~~~~~~~~~~~~


Enjoy!

Monday, September 27, 2010

Daring Bakers: Decorated Sugar Cookies

The September 2010 Daring Bakers’ challenge was hosted by Mandy of “What the Fruitcake?!” Mandy challenged everyone to make Decorated Sugar Cookies based on recipes from Peggy Porschen and The Joy of Baking.

I had made sugar cookies from scratch once before when I made these cookies for the challenge. I was excited to try a new recipe and see how it compared.

Once again, I had trouble with the dough being very crumbly.

If ANYONE knows why this is happening, please let me know! (One theory presented so far is that it's because I use a hand mixer and perhaps the recipe is better suited for the faster and more powerful stand mixers?)

I had to smoosh the dough together to get it to form a ball so I could roll it out.

I did really like Mandy's tip in the recipe of rolling out the dough right after mixing and then refrigerating it so it's easier to roll out; versus refrigerating and then rolling out. I also think the refrigerating after cutout and before baking also helped hold the shape. Her other very handy tip was rolling out the dough in between two layers of wax paper; I loved that!

Sorry, I didn't get pictures of the dough rolled out or in the fridge.

Even though this recipe still had crumbly dough, it did a much better job holding the shape of the cutout than the recipe I tried last time.

Baked cookies on the left; cut out dough on the right...almost exactly the same!

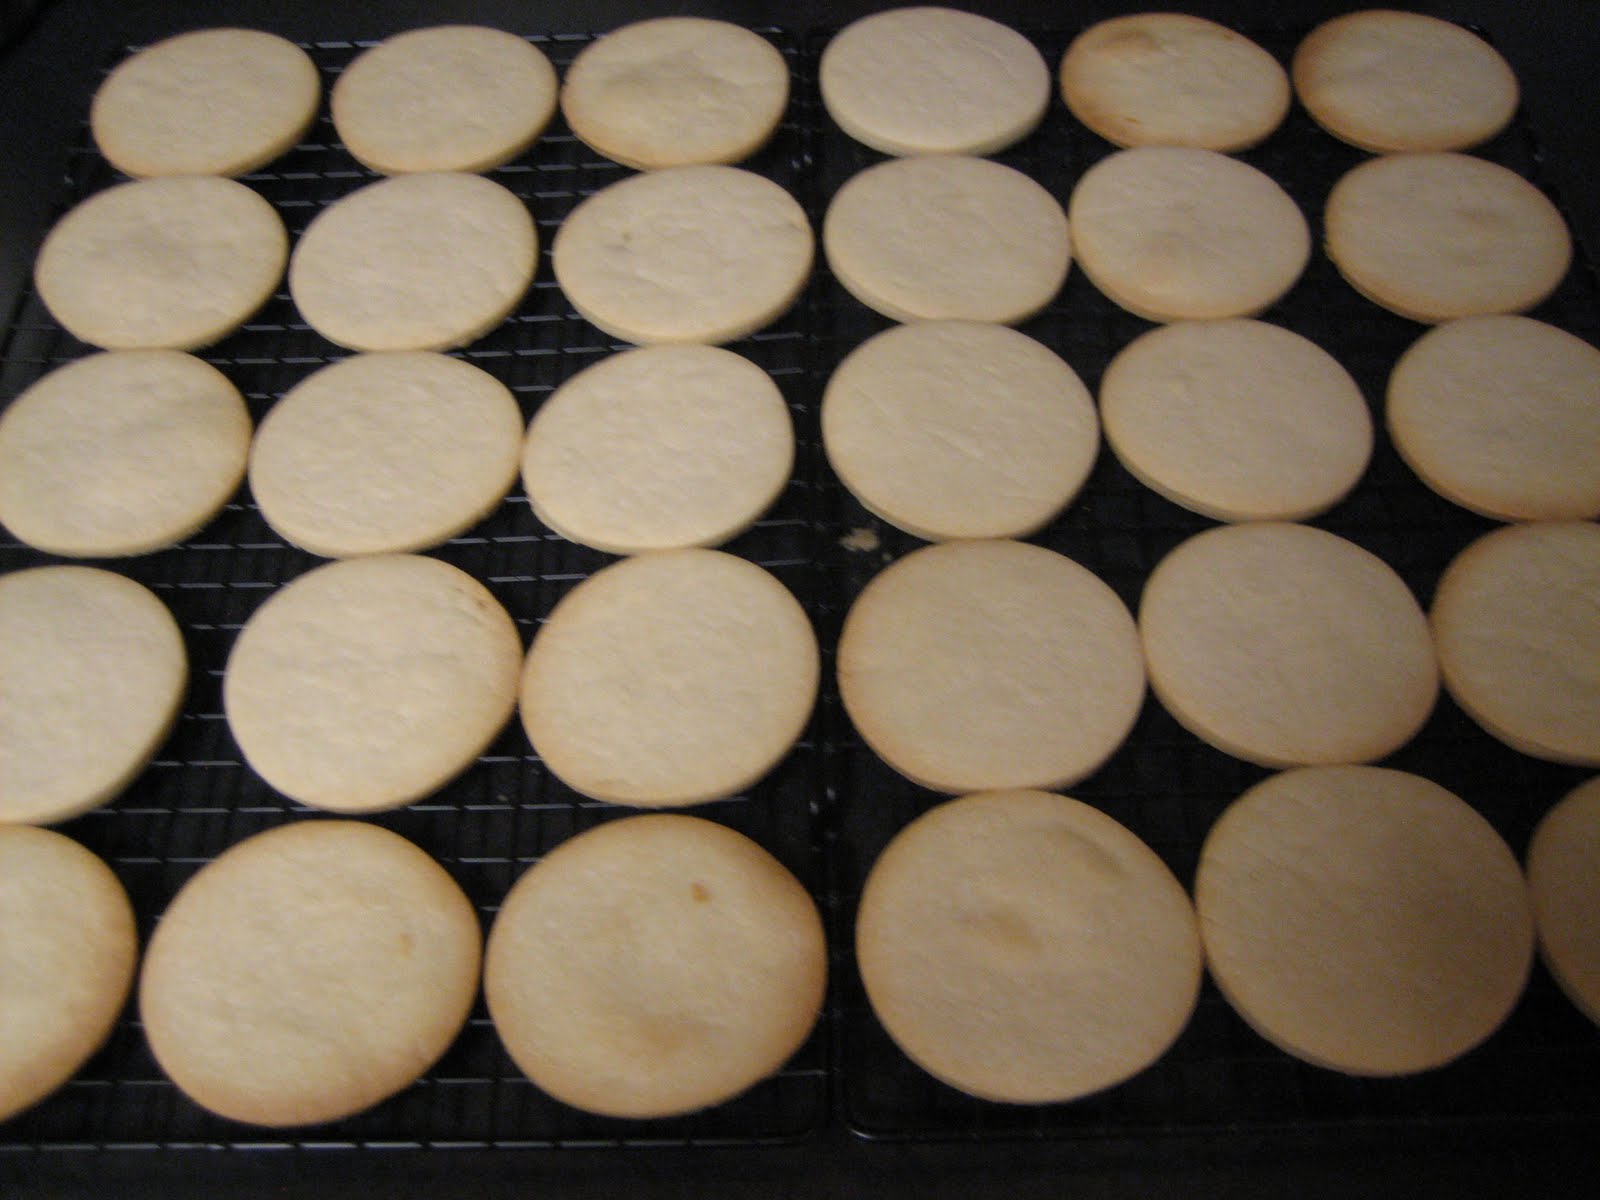
All the baked cookies cooling on the rack.

The challenge required that we decorate the cookies with royal icing, using a flooding technique and any additional piping we wanted. However, the challenge didn't require us to use a specific royal icing recipe, so I just used the Wilton recipe that I usually use.

I knew I didn't need an entire batch of sugar cookies sitting in my house (after all, I have a wedding dress to fit into), so I found them a nice home.

My cousin is a firefighter, so I took the cookies to his firehouse. With that plan in mind, I used a variation of the fire department's logo to decorate the cookies.

I'm told the guys ate them up right away! Which is great news, since it's very likely they'll be receiving the results of future Daring Bakers Challenges.

Here's the recipe if you want to give this version of sugar cookies a try:

~~~~~~~~~~~~~~~~~~~~~~~~~~~~~

Basic Sugar Cookies:

Preparation Time
30 minutes: Making dough & rolling
1 hour min: Refrigeration
8-15 minutes: Baking per tray depending on size of cookies

Makes Approximately 36x 10cm / 4" Cookies

200g / 7oz / ½ cup + 6 Tbsp Unsalted Butter, at room temperature
400g / 14oz / 3 cups + 3 Tbsp All Purpose / Plain Flour
200g / 7oz / 1 cup Caster Sugar / Superfine Sugar
1 Large Egg, lightly beaten
5ml / 1 tsp Vanilla Extract / Or seeds from 1 vanilla bean

Directions
•Cream together the butter, sugar and any flavourings you’re using. Beat until just becomingcreamy in texture.
• Tip: Don’t over mix otherwise you’ll incorporate too much air and the cookies will spread duringbaking, losing their shape.
• Beat in the egg until well combined, make sure to scrape down the sides of the bowl.Add the sifted flour and mix on low until a non sticky dough forms.
• Tip: I don’t have a stand mixer so I find it easier to switch to dough hooks at this stage to avoidflour flying everywhere.
• Knead into a ball and divide into 2 or 3 pieces.
• Roll out each portion between parchment paper to a thickness of about 5mm/1/5 inch (0.2 inch)
• Refrigerate for a minimum of 30mins.
• Tip: Recipes commonly just wrap the whole ball of dough in clingwrap and then refrigerate it for anhour or overnight, but by rolling the dough between parchment, this shortens the chilling time andthen it’s also been rolled out while still soft making it easier and quicker.
• Once chilled, peel off parchment and place dough on a lightly floured surface.
• Cut out shapes with cookie cutters or a sharp knife.
• Arrange shapes on parchment lined baking sheets and refrigerate for another 30mins to an hour.
• Tip: It’s very important you chill them again otherwise they’ll spread while baking.
• Re-roll scraps and follow the above process until all scraps are used up.
• Preheat oven to 180°C (160°C Fan Assisted) / 350°F / Gas Mark 4.
• Bake until golden around the edges, about 8-15mins depending on the size of the cookies.
• Tip: Bake same sized cookies together otherwise mixing smaller with larger cookies could result insome cookies being baked before others are done.
• Tip: Rotate baking sheets half way through baking if your oven bakes unevenly.
• Leave to cool on cooling racks.
• Once completely cooled, decorate as desired.
• Tip: If wrapped in tinfoil/cling wrap or kept in airtight containers in a cool place, un-decoratedcookies can last up to a month.
~~~~~~~~~~~~~~~~~~~~~~~~~~~~~

Enjoy!
Wednesday, September 8, 2010

BBQ Recap & Sweet Links

A couple of weekends ago, my fiancé and I hosted an end of summer BBQ. (I know, I'm very behind on posting.) This summer has gone by so fast and so much of our free time has been spent on wedding planning that we wanted to get in one last summer celebration before the seasons change.

It was also the last BBQ at my house which was somewhat bittersweet. But we did it right – great friends and great food made for a great night!

We provided the meat and fixings, refreshments and desserts. Oh did we have desserts...but more on that later!

We asked guests to bring a salad or side dish to share and we had an overflowing table of amazing and delicious dishes. We have some very talented friends and I definitely need to track down some of the recipes!

Unfortunately I didn’t get a picture of everything, but some of the highlights were:

Broccoli, Almond and Grape Salad – It might sound odd, but it was wonderful
Cha Cha Chicken Canapes – These were all gone by the end of the night
Deviled Eggs – A classic; they were gone immediately
Fruit Salad – Very refreshing
Roasted Vegetables – Delicious; they balanced out the sweets, or so I like to tell myself
Homemade Baked Beans – Perfect for a BBQ
Baked Jalepeno Cheese Dip – This is one of my favorites.
Pioneer Woman’s Bacon Jalepeno Poppers – Of course!

I’m sure I’m forgetting some of the fabulous dishes, so my apologies, they were all great and there were just too many to keep track of.

Also, my fiancé did an excellent job at the grill!

To finish off the menu, we had a selection of desserts.

Everybody had their personal favorites; which is the whole point of offering a selection of desserts. Even some of the items that I wasn’t thrilled with found a fan in the crowd. Below is a list of the desserts (with links to the recipes) and my editorial thoughts.

Italian Cream Cake (from Pioneer Woman’s Friend) – I was very much looking forward to this and thought it would be my favorite. Sadly, however, I wasn’t as thrilled with it as I anticipated…it was really, really sweet; perhaps a tad too sweet. I used unsalted butter in the recipe (because I always use unsalted butter for baking) but I’m wondering if salted butter would have balanced out some of the sweetness…the recipe did not specify.

Better Than Crack Brownies (from How Sweet Treats) – This were a crowd favorite, they were delicious and not very hard to make at all. If you like peanut butter and chocolate, this is a must try.

Chewy Lime and Coconut Sugar Cookies (from Two Peas and their Pod) – These were my favorite! I love coconut and the hint of lime gave them the perfect fresh and tropical taste. Very good!

Brown Butter Pound Cake Ice Cream Petit Fours (from July Daring Bakers Challenge) – I liked how the pound cake turned out; I wasn’t thrilled with the dark chocolate glaze. These were definitely not my favorite, but they did find a few fans that loved the dark chocolate glaze.

Enjoy!

Friday, August 27, 2010

Daring Bakers: Brown Butter Pound Cake Ice Cream Petit Fours

The August 2010 Daring Bakers’ challenge was hosted by Elissa of 17 and Baking. For the first time, The Daring Bakers partnered with Sugar High Fridays for a co-event and Elissa was the gracious hostess of both. Using the theme of beurre noisette, or browned butter, Elissa chose to challenge Daring Bakers to make a pound cake to be used in either a Baked Alaska or in Ice Cream Petit Fours. The sources for Elissa’s challenge were Gourmet magazine and David Lebovitz’s “The Perfect Scoop”.

I chose to go with the Ice Cream Petit Fours. I thought it’d be a safer bet than the Baked Alaska; in my mind the Baked Alaska would be tougher and after last month’s challenge I really didn’t want to risk a second disaster in a row…plus I don’t have a kitchen torch L

It was my first time to brown butter and I think it went alright, next time I’ll probably stop cooking the butter just a tad earlier, but it turned out fine.

Since last month’s challenge also included ice cream, and since my attempt didn’t quite make it that far, I did get to save myself a step this month and use the ice cream I made last month. I think it was a bit more than what was required this month because my layer of ice cream ended up much thicker than the pictures from the examples, but that’s okay.

Ice Cream without an Ice Cream Maker

I also did a terribly job cutting the petit fours into neat little squares, some were so uneven they couldn’t stand up on their own. Oh well…

Uneven Petit Fours in the Freezer

I chose to use the Agave Nectar in my chocolate glaze; I’m not sure if it was that or just the cocoa content of the dark chocolate I chose, but it was very dark chocolate-y…a bit too much so for me, but others liked it.

I served the Ice Cream Petit Fours at a BBQ last weekend; more details from the BBQ will be posted later. Unfortunately, because there were so many wonderful things to choose from (I was afraid the petit fours wouldn’t turn out); there were plenty left.

Apologies for the lack of pictures, it's partly due to my lack of hands and partly due to lack of time (preparing for the BBQ).

If you want to try them, give me a call and I’ll give you some from my freezer OR you can try making them yourself! Here are the recipes (my commentary italicized):

~~~~~~~~~~~~~~~~~~~~~~~~~~~~~
Brown Butter Pound Cake Ice Cream Petit Fours


Vanilla Ice Cream
(Note: I did not use this recipe, I used the recipe from last month's challenge.)

1 cup (250ml) whole milk
A pinch of salt
3/4 cup (165g) sugar
1 vanilla bean, split lengthwise OR 2 teaspoons (10ml) pure vanilla extract
2 cups (500ml) heavy (approx 35% butterfat) cream
5 large egg yolks
1 teaspoon (5ml) pure vanilla extract

1. Heat the milk, salt, and sugar in a medium saucepan until the liquid steams. Scrape out the seeds of the vanilla bean with a paring knife and add to the milk, along with the bean pod. Cover, remove from heat, and let infuse for an hour. (If you do not have a vanilla bean, simply heat the milk, salt, and sugar in a medium saucepan until the liquid steams, then let cool to room temperature.)
2. Set up an ice bath by placing a 2-quart (2 litre) bowl inside a large bowl partially filled with water and ice. Put a strainer on top of the smaller bowl and pour in the cream.
3. In another bowl, lightly beat the egg yolks together. Reheat the milk in the medium saucepan until warmed, and then gradually pour ¼ cup warmed milk into the yolks, constantly whisking to keep the eggs from scrambling. Once the yolks are warmed, scrape the yolk and milk mixture back into the saucepan of warmed milk and cook over low heat. Stir constantly and scrape the bottom with a spatula until the mixture thickens into a custard which thinly coats the back of the spatula.
4. Strain the custard into the heavy cream and stir the mixture until cooled. Add the vanilla extract (1 teaspoon [5ml] if you are using a vanilla bean; 3 teaspoons [15ml] if you are not using a vanilla bean) and refrigerate until thoroughly chilled, preferably overnight.
5. Remove the vanilla bean and freeze in an ice cream maker. If you don’t have an ice cream maker, you can make it without a machine. See instructions from David Lebovitz: http://www.davidlebovitz.com/archives/2007/07/making_ice_crea_1.html


Brown Butter Pound Cake

19 tablespoons (9.5 oz) (275g) unsalted (sweet) butter
2 cups (200g) sifted cake flour (not self-rising; sift before measuring) (You can make 1 cup of cake flour by placing 2 tablespoons of corn starch in a 1 cup measure, and filling to the top with all purpose flour.) - I used the corn starch method, I couldn't find cake flour anywhere!
1 teaspoon (5g) baking powder
1/2 teaspoon (3g) salt
1/2 cup (110g) packed light brown sugar
1/3 (75g) cup granulated sugar
4 large eggs
1/2 teaspoon pure vanilla extract

1. Preheat the oven to 325°F/160°C and put a rack in the center. Butter and flour a 9”x9” (23cmx23cm) square pan.
2. Place the butter in a 10” (25cm) skillet over medium heat. Brown the butter until the milk solids are a dark chocolate brown and the butter smells nutty. (Don’t take your eyes off the butter in case it burns.) Pour into a shallow bowl and chill in the freezer until just congealed, 15-30 minutes.
3. Whisk together cake flour, baking powder, and salt.
4. Beat the brown butter, light brown sugar, and granulated sugar in an electric mixer until light and fluffy, about 2 minutes. Beat in the eggs one at a time, mixing well, and then the vanilla extract.
5. Stir in the flour mixture at low speed until just combined.
6. Scrape the batter into the greased and floured 9”x9” (23cmx23cm) square pan. Smooth the top with a rubber spatula and rap the pan on the counter. Bake until golden brown on top and when a toothpick inserted into the center comes out clean, about 25 minutes.
7. Cool in the pan 10 minutes. Run a knife along the edge and invert right-side-up onto a cooling rack to cool completely.


Chocolate Glaze
9 ounces (250g) dark chocolate, finely chopped
1 cup (250 ml) heavy (approx 35% butterfat) cream
1 1/2 tablespoons (32g) light corn syrup, Golden syrup, or agave nectar (I used agave nectar)
2 teaspoons (10ml) vanilla extract

Stir the heavy cream and light corn syrup in a small saucepan over medium heat until it comes to a boil. Remove from heat and add the dark chocolate. Let sit 30 seconds, then stir to completely melt the chocolate. Stir in the vanilla and let cool until tepid before glazing the petit fours.


Assembly Instructions

1. Line a 9”x9” (23cmx23cm) pan with plastic wrap, so that no sides of the pan are exposed and so there is some extra plastic wrap hanging off the sides. Spread 1 ¾ to 2 cups (450ml to 500ml) ice cream into the pan. Cover with more plastic wrap and freeze several hours.
2. Once the brown butter pound cake has completely cooled, level the top with a cake leveler or a serrated knife. Then split the cake in half horizontally to form two thin layers.
3. Unwrap the frozen ice cream. Flip out onto one of the layers of cake and top with the second layer of cake. Wrap well in plastic wrap and return to the freezer overnight.
4. Make the chocolate glaze (see above.)
5. While the glaze cools, trim ¾” (2cm) off each side of the ice cream cake to leave a perfectly square 7.5” (19cm) ice cream cake. Cut the cake into twenty five petit fours, each 1.5”x1.5” (4cmx4cm).
6. Glaze the petit fours one at a time: place a petit four on a fork and spoon chocolate glaze over it.
7. Place the petit fours on a parchment-lined baking sheet and return to the freezer for one hour.

~~~~~~~~~~~~~~~~~~~~~~~~~~~~~


Enjoy!

Tuesday, July 27, 2010

Daring Bakers: Swiss Swirl Ice Cream Cake AKA My Baking Disaster

The July 2010 Daring Bakers’ challenge was hosted by Sunita of Sunita’s World – Life and Food. Sunita challenged everyone to make an ice-cream filled Swiss roll that’s then used to make a bombe with hot fudge. Her recipe is based on an ice cream cake recipe from Taste of Home.

Unfortunately, my recipe was a complete bomb and not so much of a bombe (sorry, I couldn't resist).
Here's what it was supposed to look like:

Pictures from Sunita

The recipe called for homemade everything. I made the ice cream, without an ice cream maker. (I haven't tasted it yet, but that part appeared to work.)

Then I made the swiss roll cake and that's where everything went terribly wrong. The eggs didn't beat up like they were supposed to...I stood there for over 20 minutes and they just weren't getting the right consistency; I think my hand mixer maybe didn't have enough power or something (the recipe said prep should be about 10 minutes and I was already way past that). I decided to move forward anyway.

The recipe said that it should bake for 10-12 minutes. I didn't know if my oven temp was off, but it was not setting up at all...I had it in there for over 30 minutes. (See update below!)

I thought maybe it was supposed to be like that, so I took it out and tried to flip it onto a kitchen towel...but sure enough it wasn't done and it didn't work at all.

I've narrowed the cause of the failure to one or more of the following factors:

* I halved the recipe (but the ratios were the same so that should have been fine)
* The eggs didn't reach the right consistency before folding in the flour and chocolate (this is most likely the cause)
* My oven temp is off
* I maybe could have been a bit more focused on the recipe instead of trying to multi-task, but things have been so busy lately I had to squeeze it in on Sunday night to meet the deadline
***UPDATE: As I was finalizing this blog post I realized my error. I didn't see that the recipe provided two different baking temps (one C and one F). I obviously used the wrong one! Clearly I should not have been multi-tasking and should have read the recipe more closely.***
Oh well, you can't win them all :( And now I know. It's a rather embarrassing error, but these things happen in real life.

I'll have to revisit this recipe sometime in the future. Maybe after I get a stand mixer, I have a little more time and I set the oven temp correctly.

For those of you that want to take a stab at it, the recipe is below.
~~~~~~~~~~~~~~~~~~~~~~~~~~~~~~~~~~~~~~~~~~~~~~~~
Swiss Roll Ice Cream Cake
(inspired by the recipe of the same name from Taste of Home)
For the recipe with step-by-step photos visit Sonita's site: http://sunitabhuyan.com/

The Swiss Rolls
Preparation time- 10 minutes
Baking time- 10-12 minutes
Rolling and cooling time- at least 30 minutes
Filling-5-8 minutes
Filling and rolling- 5-10 minutes
Ingredients
6 medium sized eggs
1 C / 225 gms caster sugar /8 oz+ extra for rolling
6 tblsp / 45gms/ a pinch over 1.5 oz of all purpose (plain) flour + 5 tblsp/40gm /a pinch under 1.5 oz of natural unsweetened cocoa powder, sifted together
2 tblsp /30ml / 1 fl oz of boiling water
a little oil for brushing the pans
For the filling
2C / 500 mls/ 16 fl oz of whipping cream
1 vanilla pod, cut into small pieces of about ½ cm (or 1 tsp vanilla extract)
5 tblsp / 70gms/2.5oz of caster sugar
Method
Pre heat the oven at 200 deg C /400 deg F approximately. Brush the baking pans ( 11 inches by 9 inches ) with a little oil and line with greaseproof baking paper. If you have just one pan, bake one cake and then let the pan cool completely before using it for the next cake.
In a large mixing bowl, add the eggs and sugar and beat till very thick; when the beaters are lifted, it should leave a trail on the surface for at least 10 seconds.
Add the flour mixture, in three batches and fold in gently with a spatula. Fold in the water.
Divide the mixture among the two baking pans and spread it out evenly, into the corners of the pans.
Place a pan in the centre of the pre heated oven and bake for about 10-12 minutes or till the centre is springy to the touch.
Spread a kitchen towel on the counter and sprinkle a little caster sugar over it.
Turn the cake on to the towel and peel away the baking paper. Trim any crisp edges.
Starting from one of the shorter sides, start to make a roll with the towel going inside. Cool the wrapped roll on a rack, seam side down.
Repeat the same for the next cake as well.
Grind together the vanilla pieces and sugar in a food processer till nicely mixed together. If you are using vanilla extract, just grind the sugar on its own and then add the sugar and extract to the cream.
In a large bowl, add the cream and vanilla-sugar mixture and beat till very thick.
Divide the cream mixture between the completely cooled cakes.
Open the rolls and spread the cream mixture, making sure it does not go right to the edges (a border of ½ an inch should be fine).
Roll the cakes up again, this time without the towel. Wrap in plastic wrap and chill in the fridge till needed, seam side down.
The Vanilla Ice Cream
Preparation time-5 minutes+freezing
I have made the ice cream without an ice cream maker.
Ingredients
2 and ½ C / 625 ml / 20 fl oz of whipping cream
1 vanilla bean, minced or 1 tsp/ 5 ml/ .15 fl oz vanilla extract
½ C / 115gms/ 4 oz of granulated sugar
Method
Grind together the sugar and vanilla in a food processor. In a mixing bowl, add the cream and vanilla –sugar mixture and whisk lightly till everything is mixed together. If you are using the vanilla extract, grind the sugar on its own and then and the sugar along with the vanilla extract to the cream.
Pour into a freezer friendly container and freeze till firm around the edges. Remove from the freezer, beat till smooth and return to the freezer. Do this 3-4 times and then set completely.
The Hot Fudge Sauce
Preparation time-2 minutes
Cooking time-2 minutes
Ingredients
1 C / 230gms/ 8 oz of caster sugar
3 tblsp / 24gms/1.5 oz of natural unsweetened cocoa powder
2 tblsp /15gms/ 1 oz of cornflour/cornstarch
1 and ½ C /355ml /12 fl oz of water
1 tblsp /14gms/ 1 oz butter
1 tsp/5 ml / .15 fl oz vanilla extract
Method
In a small saucepan, whisk together the sugar, cocoa powder, cornflour and water.
Place the pan over heat, and stir constantly, till it begins to thicken and is smooth (for about 2 minutes).
Remove from heat and mix in the butter and vanilla. Keep aside to cool .
The Chocolate Ice Cream
Preparation time- 5 minutes + freezing
Ingredients
2C/ 500 ml whipping cream
1 C/230gms/8 oz caster sugar
3 tblsp/ 24 gms/1.5 oz of natural unsweetened cocoa powder
Method
Grind together the sugar and the cocoa powder in a food processor .
In a saucepan, add all the ingredients and whisk lightly.
Place the pan over heat and keep stirring till it begins to bubble around the edges.
Remove from heat and cool completely before transferring to a freezer friendly container till firm around the edges. If you are using an ice cream maker, churn the ice cream according to the manufacturer’s instruction, after the mixture has cooled completely.
5. Remove from the freezer, beat till smooth and return to the freezer. Do this 3-4 times and then set completely.
Assembly
1. Cut the Swiss rolls into 20 equal slices ( approximately 2 cms each ).
2. Cover the bottom and sides of the bowl in which you are going to set the dessert with cling film/plastic wrap.
3. Arrange two slices at the bottom of the pan, with their seam sides facing each other. Arrange the Swiss roll slices up the bowl, with the seam sides facing away from the bottom, to cover the sides of the bowl. Cover the bowl with plastic wrap and freeze till the slices are firm (at least 30 minutes).
4. Soften the vanilla ice cream. Take the bowl out of the freezer, remove the cling film cover and add the ice cream on top of the cake slices. Spread it out to cover the bottom and sides of the bowl. Cover the bowl with plastic wrap and freeze till firm ( at least 1 hour)
5. Add the fudge sauce over the vanilla ice cream, cover and freeze till firm . ( at least an hour)
6. Soften the chocolate ice cream and spread it over the fudge sauce. Cover with plastic wrap and freeze for at least 4-5 hours till completely set .
7. Remove the plastic cover, and place the serving plate on top of the bowl. Turn it upside down and remove the bowl and the plastic lining. If the bowl does not come away easily, wipe the outsides of the bowl with a kitchen towel dampened with hot water. The bowl will come away easily.
8. Keep the cake out of the freezer for at least 10 minutes before slicing, depending on how hot your region is. Slice with a sharp knife, dipped in hot water.
~~~~~~~~~~~~~~~~~~~~~~~~~~~~~~~~~~~~~~~~~~~~~~~~


Good luck and be sure you have the right oven temperature set ;)

Sunday, June 27, 2010

Daring Bakers: Chocolate Pavlovas with Chocolate Mascarpone Mousse

It’s official; I’m now a member of the Daring Bakers! I’m so excited! When I first started reading food blogs, and seeing Daring Bakers posts I was intrigued, it was one of the reasons I started thinking about beginning my own blog.

As a little background here is my interpretation of Daring Bakers.
It was started by a couple of food bloggers that thought it would be fun to create a virtual community around a shared love for food. Each month a challenge would be selected that all of the members could work on; something that might be out of each person’s normal baking repertoire or that might stretch an individual’s current skill and experience level. All the members would be experiencing the same challenge within the same month and then share their results with the world on the same day. No, it’s not a contest, it’s just for fun. Daring Bakers have TONS of members from all over the world. (You can find more details on what Daring Bakers is all about on the Daring Kitchen web site.)

Now, for the fun part…my VERY FIRST DARING BAKERS CHALLENGE!

The June 2010 Daring Bakers’ challenge was hosted by Dawn of Doable and Delicious. Dawn challenged the Daring Bakers’ to make Chocolate Pavlovas and Chocolate Mascarpone Mousse. The challenge recipe is based on a recipe from the book Chocolate Epiphany by Francois Payard.

This recipe was really made up of four sub-recipes, so needless to say it was a bit of an undertaking. However, not all four parts had to be completed at the same time, so I broke it up into two days. I made Recipe 1: Chocolate Meringue and Recipe 4: Crème ANglaise on one night. The next night I made Recipe 2: Chocolate Mascarpone Mousse and Recipe 3: Mascarpone Cream and then assembled it all together (actually, I was taking it to a party so I didn’t put the Mascarpone Cream on until we got to the party).

I had never made meringue or mousse before, so I was looking forward to something new. The Cream Anglaise, though different, seemed very similar to the custard like filling I made for the fruit tart.

Here’s the recipe with my pictures and my commentary italicized.

~~~~~~~~~~~~~~~~~~~~~~~~~~~~~~~~~~~
Chocolate Pavlovas with Chocolate Mascarpone Mousse


Recipe 1: Chocolate Meringue (for the chocolate Pavlova):

3 large egg whites
½ cup plus 1 tbsp (110 grams) white granulated sugar
¼ cup (30 grams) confectioner’s (icing) sugar
1/3 cup (30 grams) cocoa powder

Directions:
Place a rack in the center of the oven and preheat to 200º F (95º C) degrees. Line two baking sheets with silpat or parchment and set aside. (I used parchment paper)

Put the egg whites in a bowl and whip until soft peaks form. Increase speed to high and gradually add granulated sugar about 1 tbsp at a time until stiff peaks form. The whites should be firm but moist.

Sift the confectioner’s sugar and cocoa powder over the egg whites and fold the dry ingredients into the white. This looks like it will not happen. Fold gently and it will eventually come together. (This really did take some patience)


Fill a pastry bag with the meringue. Pipe the meringue into whatever shapes you desire. Alternatively, you could just free form your shapes and level them a bit with the back of a spoon. (Since I was taking these to a party, I wanted mini versions that would be easy for folks to grab and eat while they mingled. I made some small circle disks and I tried to make some small circle cups…I had no idea if they would work but they actually did. I used the last little bit of meringue and made some chocolate meringue ‘kisses’.)

Going into the oven.

Bake for 2-3 hours until the meringues become dry and crisp. Cool and store in an airtight container for up to 3 days. (I baked mine for the full 3 hours)

Just out of the oven.

Since I made these the first night, I stored them in an airtight container until I was ready to assemble them the next night.


Recipe 2: Chocolate Mascarpone Mousse (for the top of the Pavlova base):

1 ½ cups (355 mls) heavy cream (cream with a milk fat content of between 36 and 40 percent)
grated zest of 1 average sized lemon
9 ounces (255 grams) 72% chocolate, chopped (I could only find 70% chocolate at my grocery store and it worked fine.)
1 2/3 cups (390 mls) mascarpone
pinch of nutmeg
2 tbsp (30 mls) orange juice

Directions:
Put ½ cup (120 mls) of the heavy cream and the lemon zest in a saucepan over medium high heat. Once warm, add the chocolate and whisk until melted and smooth. Transfer the mixture to a bowl and let sit at room temperature until cool.


Place the mascarpone, the remaining cup of cream and nutmeg in a bowl. Whip on low for a minute until the mascarpone is loose. Add the orange juice and whip on medium speed until it holds soft peaks. DO NOT OVERBEAT AS THE MASCARPONE WILL BREAK.

Mix about ¼ of the mascarpone mixture into the chocolate to lighten. Fold in the remaining mascarpone until well incorporated. Fill a pastry bag with the mousse. Again, you could just free form mousse on top of the pavlova.


Recipe 3: Mascarpone Cream (for drizzling):

1 recipe crème anglaise
½ cup (120 mls) mascarpone
½ cup (120 mls) heavy cream

Directions:
Prepare the crème anglaise. Slowly whisk in the mascarpone and let the mixture cool. Put the cream in a bowl and beat with electric mixer until very soft peaks are formed. Fold the cream into the mascarpone mixture.

Recipe 4: Crème Anglaise (a component of the Mascarpone Cream above):

1 cup (235 mls) whole milk
1 cup (235 mls) heavy cream
1 vanilla bean, split or 1 tsp pure vanilla extract
6 large egg yolks
6 tbsp (75 grams) sugar

Directions:
In a bowl, whisk together the egg yolks and sugar until the mixture turns pale yellow.
Combine the milk, cream and vanilla in a saucepan over medium high heat, bringing the mixture to a boil. Take off the heat.

Pour about ½ cup of the hot liquid into the yolk mixture, whisking constantly to keep from making scrambled eggs. Pour the yolk mixture into the pan with the remaining cream mixture and put the heat back on medium. Stir constantly with a wooden spoon until the mixture thickens enough to lightly coat the back of a wooden spoon. DO NOT OVERCOOK.

Remove the mixture from the heat and strain it through a fine mesh sieve into a bowl. Cover and refrigerate until the mixture is thoroughly chilled, about 2 hours or overnight.


Assembly:
Pipe the mousse onto the pavlovas and drizzle with the mascarpone cream over the top. Dust with confectioner’s sugar and fresh fruit if desired. (For mine, I piped the mousse into the meringue cups. For the meringue disks I piped the mousse on top and then layered them into little stacks. As I noted earlier, I did not put the mascarpone cream on until just before serving. I will note, that for the few that were left at the end of the night, the meringue absorbed a lot of the moisture from the cream and they weren't as crisp as they started out.)

Meringue cup filled with the mousse.

All the cups.

All of them, pre-party.
~~~~~~~~~~~~~~~~~~~~~~~~~~~~~~~~~~~

These were very good, but very, very rich.

Finished at the party with the mascarpone cream drizzle.

Enjoy!

I can’t wait for my next Daring Bakers Challenge, I wonder what it will be…